What are Texture Projects? #
Texture Projects is Toolbag’s native system for creating and painting textures for 3D models in real time. Texture Projects were introduced in version 4.0.
Texture Project offers a seamless and intuitive layers/masks workflow for texture creation and manipulation. You can set up a texture project from scratch, or take the Texture Project scene file in the Library for a test drive to dissect its setup.
To get started with a Texture Project, you will need:
- A 3D model with UV coordinates.
- Input Maps, which drive processors and generators. If your texture maps were baked in Toolbag, you can link them from your Bake Project into the Input Maps slots.
- A material from the Materials window linked to your Texture Project.
- Project Maps to help define the shading properties of your linked material.
Adding a Texture Project #
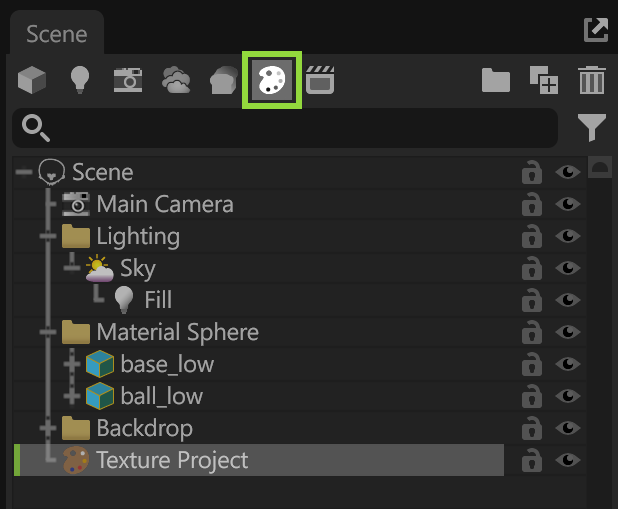
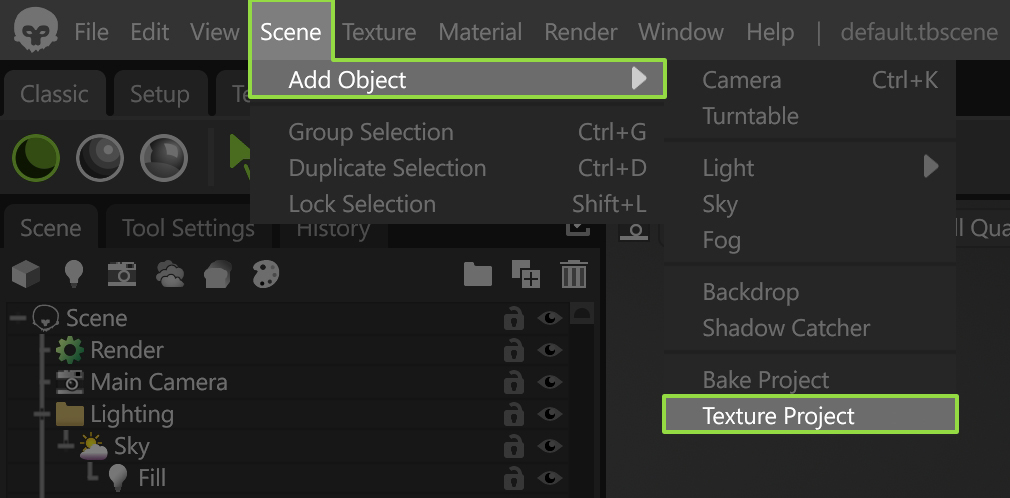
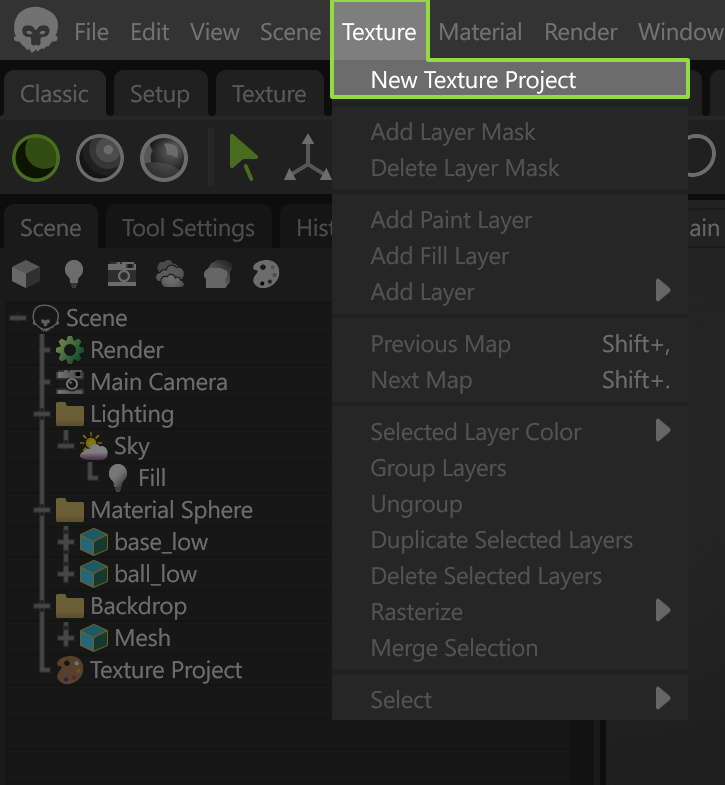
This section introduces how to add and set up texture projects in your Toolbag scene. There are four ways to add a Texture project to the Scene hierarchy, with the first being the most straightforward option.
1 – Scene Window > New Texture Project Icon
2 – Main Menu > Scene > Add Object > Texture Project
3 – Main menu > Texture > New Texture Project
4 – Layers Window > Add Texture Project
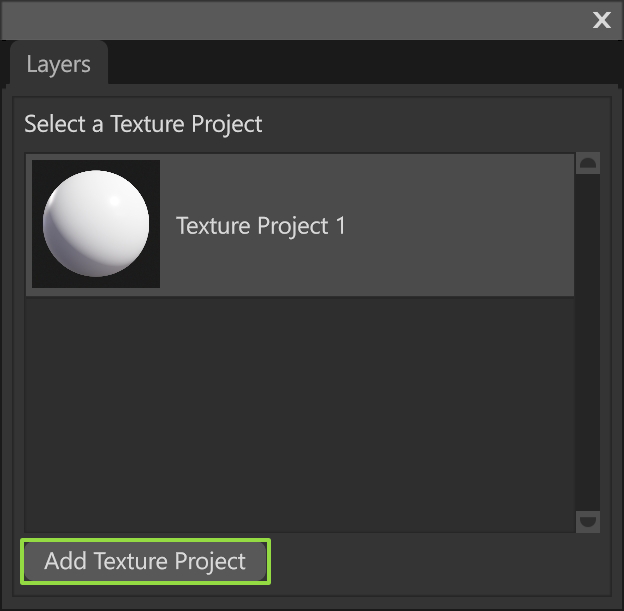
Note: You can find the Layers window in the Texture Workspace UI or via the Main Menu>Window > Layers.
Project Settings #
You can set your desired settings in the Project Settings window, with a Texture Project selected in the Scene hierarchy. Below are some definitions for each setting to help you determine the best setup for your project.
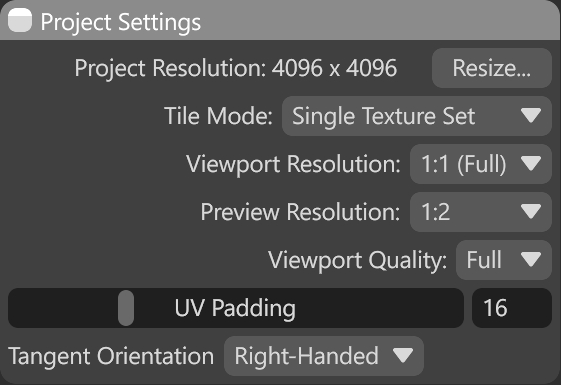
| Setting | Description |
|---|---|
| Project Resolution | This adjusts the pixel size of the texture project. If modified, Paint layers will resize to the new resolution. |
| Tile Mode | Single Texture Set: Use this mode if you only have one tile in the 0-1 space. Multiple Texture Sets: Use this mode if you have multiple overlapping UV tile layouts in the 0-1 space. Each tile needs to have a unique material applied to the corresponding low poly mesh(es). The tiles will automatically be detected based on the materials applied to your mesh(es). UDIM: Use this mode if you have multiple, non-overlapping tiles that follow the UDIM conventions, where each tile is offset by one unit in UV space (0-1, 1-2, 2-3, etc). Note: When Multiple Texture Sets or UDIM mode is selected, an additional Tiles section appears, allowing you to adjust the resolution of each tile independently. |
| Viewport Resolution | Determines the resolution of the texture project displayed in the viewport. Using less than 1:1 can significantly improve interactive performance. Paint data and exported images export at full resolution. |
| Preview Resolution | Determines the resolution when interacting with tools and layer settings. The resolution will automatically increase to the viewport resolution when the interaction pauses. Using less than 1:1 can significantly improve performance. |
| Viewport Quality | Choose between Fast and Full render quality. Fast quality is most suitable when working with larger texture projects, but there will be a delay when switching layers or making changes, along with reduced quality. Exported textures will always be full quality. |
| UV Padding | Sets the size of the UV padding effect in pixels. |
| Tangent Orientation | Configures the project to use and output tangent space normal maps in either right (Y+) or left-handed (Y-) coordinate space. Right-handed tangents are often called Maya or OpenGL style, while left-handed tangents are referred to as 3DS Max or Direct3D style. |
* Multiple tiles can be controlled by a single material with this workflow, for example the head, body, arms, legs, hands, and feet each have a unique tile but share the same material. The UDIM tiles will automatically be detected based on the UV layout in this mode
Linked Materials #
To start texturing an asset, you must first link its material(s) to a Texture Project. You can link existing materials by dragging and dropping them to Linked Materials or create a new one by clicking the plus (+) button.

| Setting | Description |
|---|---|
| Link Selected | Links the currently selected material in the material editor to the texture project chosen. |
| Create New Material | Creates a new material and links it to the texture project. |
| Remove | Removes the linked material from the texture project. |
Link a Bake Project to Texture Project #
If you have a Bake Project set up, you can easily create and link a new texture project by:
- Selecting your Bake Project object in your scene
- Locate the Tiles section of settings
- Use the Texture Project Link dropdown to select “(New Project)” or select the name of a Texture Project that already exists in your scene.
With a Bake Project and Texture Project linked, any future changes to your bakes will automatically update the Input Maps for your Texture Project.
Tiles #
The options section appears when you set your “Tile Mode” in Project Settings to either “Multiple Texture Sets” or “UDIM”. In a Texture Project, you can manage multiple materials within a single project, including seamless painting across tiles or texture sets. To do this, ensure that each material is linked to the Texture Project. These materials will be treated as tiles, just like UDIM tiles.
The choice between Multiple Texture Sets (MTS) or UDIMs depends on your project requirements and the supported features of your target game engine or renderer.
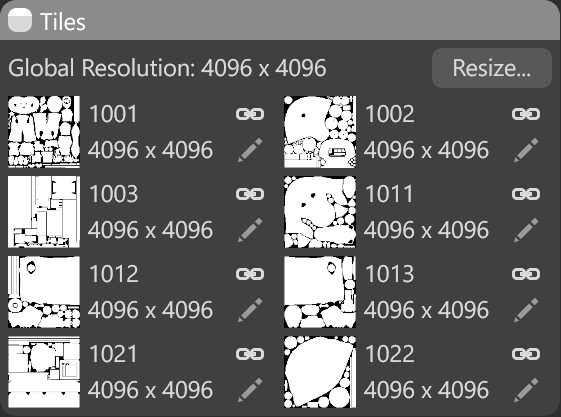
| Setting | Description |
|---|---|
| Global Resolution | Adjust the pixel size of the texture project. The project’s layers will be resized to the new resolution. |
| Link Resolution | Link the width and height of the tile to global resolution. |
| Edit Resolution | Set the resolution of the file. |

