Sky #
The Sky is a light object that simulates the illumination effects of a real sky on a scene. It contributes to the overall lighting of the scene by providing soft ambient illumination and natural-looking light diffusion. The Sky light is commonly used to imitate the global illumination effects of an outdoor or indoor environment, and can significantly enhance the realism and visual impact of rendered scenes.
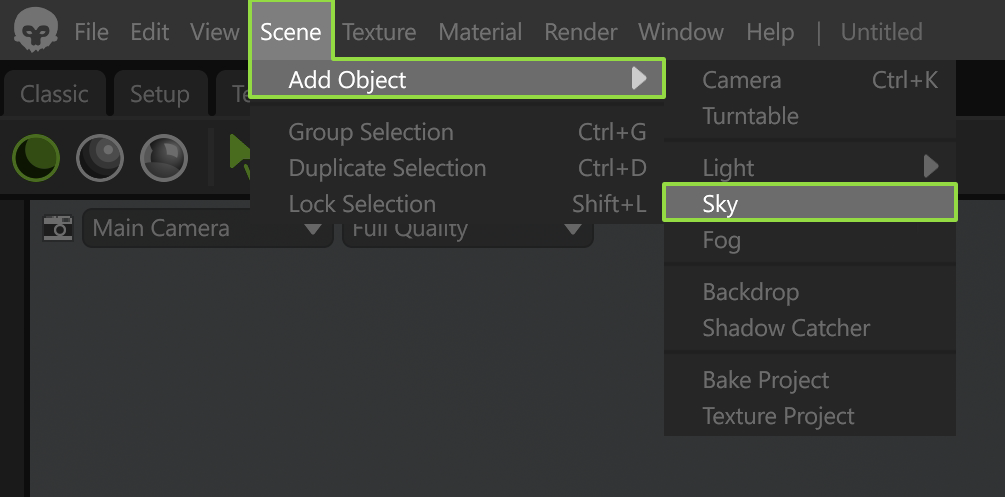
Each scene has a Sky object in the Scene hierarchy by default. But if you need an extra one, for example, to test different variations of the lighting setup, you can add another through Scene > Add Object > Sky. You can enable only one Sky object at a time.
Sky Light Settings #
Toolbag supports loading a custom HDRI image of your choosing as the Sky light, or you can choose a preset from the Skies folder of Toolbag’s integrated, free asset Library.
| Setting | Description |
|---|---|
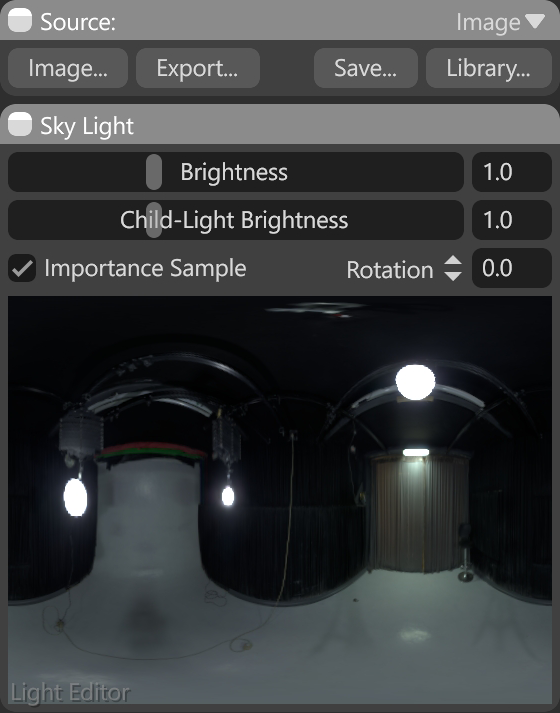
| Image | Loads a custom sky light background, which will also be used to light the scene. Use a 360-degree panoramic HDR image for best results. |
| Export | Exports the current sky to a .tbsky archive. |
| Save | Exports the current sky to the Library. |
| Library | Opens the Sky Library folder for a handy selection of sky presets. |
The Sky settings include a Light Editor window, in which you can easily add/remove directional child lights based on pixel values in your HDRI. This is useful for creating a realistic lighting setup based on the currently-loaded HDRI.
To create child lights, click anywhere on the Light Editor preview image of the Sky. A directional child light will be created in your scene, parented to the Sky light, with the exact color and brightness of the pixel you clicked on. To remove a child light, simply RMB-click on the child light in the Light Editor image.
| Setting | Description |
|---|---|
| Brightness | Sets the exposure of the image-based lighting, child lights, and background image. |
| Child-Light Brightness | Sets the exposure of child lights in relation to the master sky brightness setting. |
| Importance Sample | Toggles importance sampling of the skylight image. Disabling this option can increase ray tracing performance at the expense of skylight quality. |
| Rotation | Sets the sky direction. Applies to sky lighting, child lights, background image, and any objects parented to the sky object. Sky rotation can be set via Shift+LMB Drag in the viewport as well. |
| Light Editor | Gives a preview of the current sky lighting image, and allows creation (left click) movement (left button drag) and deletion (right click) of child lights. |
Note: At this time it is not possible to save the child lights to a Sky preset. So if you need to revert, please us undo (Ctrl+z).
Backdrop #
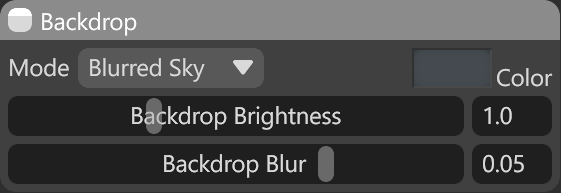
The Backdrop section determines what the global backdrop will look like. The Sky and Blurred Sky options are useful for setting your scene in a realistic backdrop or expanding your environment’s appearance. Color and Ambient Sky are useful for more simple, isolated-style renders.
| Setting | Description |
|---|---|
| Mode | Sets the presentation mode for the background image. Color draws a single color as the background, Sky displays the complete HDRI image as the background, whereas Blurred and Ambient sky render modified versions of the sky. |
| Color | Sets the color of the background. This setting only applies when the backdrop mode is set to “Color”. |
| Backdrop Brightness | Sets the exposure of the background image in relation to the master skylight brightness setting. This setting does not apply when the backdrop mode is set to color. |
| Backdrop Blur | Controls how blurry the background image is. This setting only applies when the backdrop mode is set to “Blurred Sky”. |
Light Objects #
Light objects are an essential component for lighting your scenes. Whether you’re looking to create realistic or stylized lighting, Toolbag offers different types of light sources to suit your specific needs, such as Directional lights, Spot lights, and Omni lights.
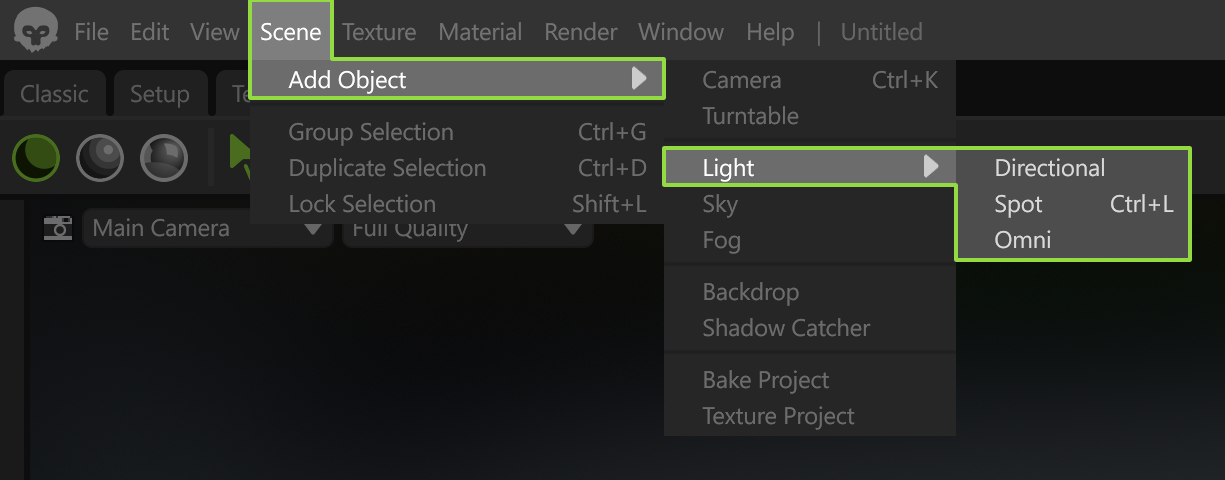
There are three ways to add a light object:
- Press the Light icon in the Scene window.
- Go to Scene menu > Add Object > Light and select a light type.
- Press Ctrl+L to create a Spot Light.
You can use the Light Controller Tool to gain fine control over your lights by clicking a point on a mesh and quickly repositioning the light,
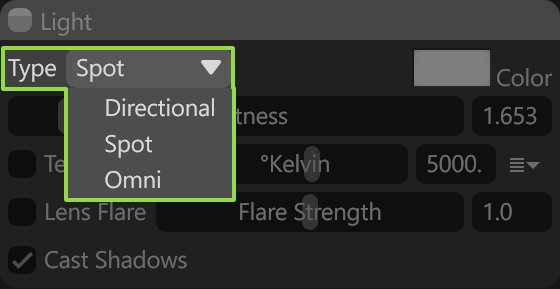
Note: You can change the light type at any time under the Type drop-down menu.
Light Types #
Directional Light
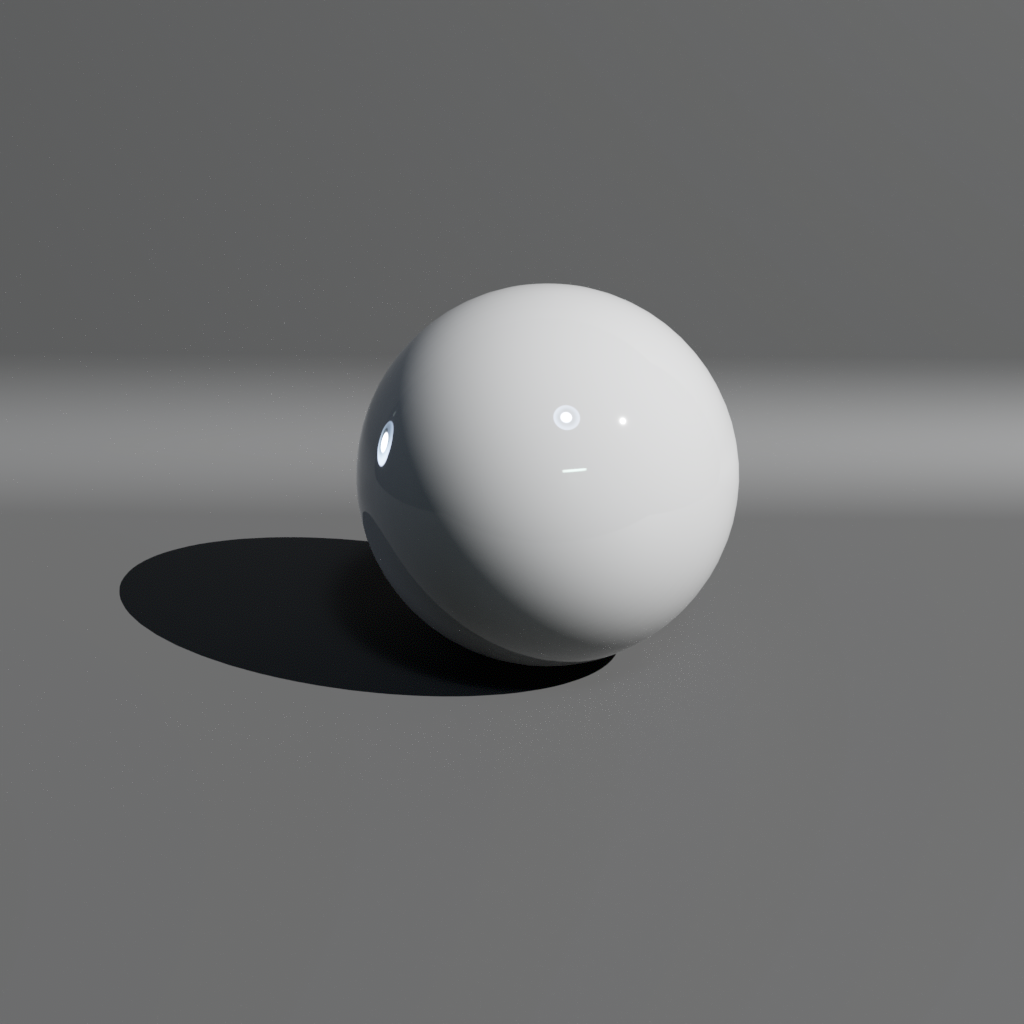
Directional lights emit parallel light rays in a specific direction. They simulate sunlight or other distant light sources, creating strong shadows with consistent intensity and direction across the scene. They are often used to establish the main source of illumination and cast long, dramatic shadows that add depth and dimension to the scene.
Spot Light
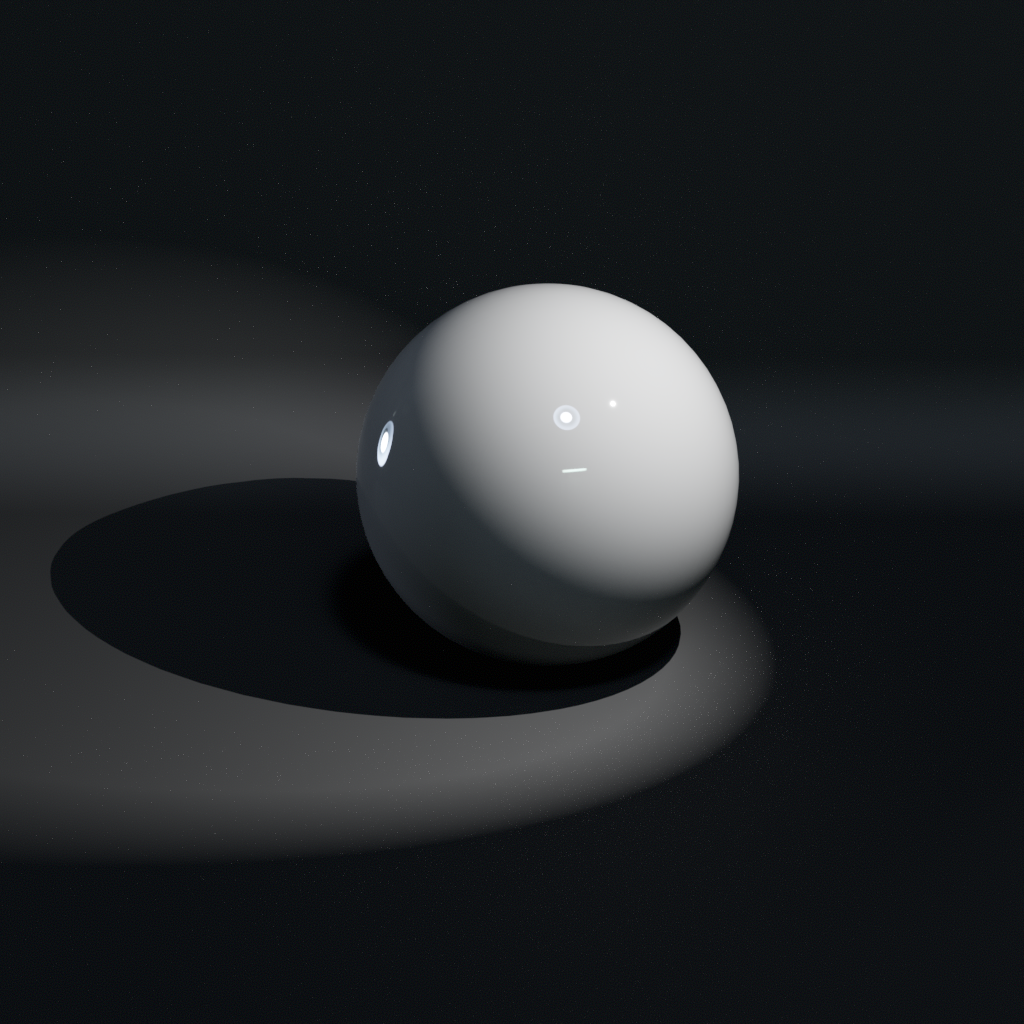
Spot lights are focused light sources that emit light in a cone-shaped beam. They are ideal for simulating localized illumination and spotlight effects within a scene. The angle of the light cone, the intensity of the light, and the sharpness of the light falloff are adjustable, making them a versatile option.
Omni Light
Omni lights can have a specific shape and size and emit light from a defined area. They produce omnidirectional lighting, which can simulate the natural softness of light sources in the real world. They are suitable for replicating a variety of light fixtures, such as overhead lights, windows, or screens.
The Shape of an Omni light can be set to:
- Sphere: This emits light in all directions from a single point in space. Such light sources are commonly used to simulate light bulbs or small light sources.
- Rectangle: This is a flat light source that emits light uniformly across its surface. Such light sources are often used to simulate light panels or windows.
Light Settings #
Once you have placed a light source in your scene, you can adjust its properties to achieve the desired lighting effect. Below is a list of settings for light objects.
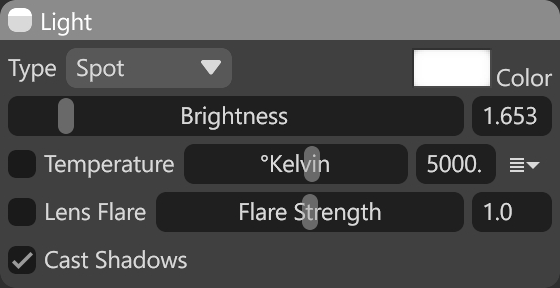
| Setting | Description |
|---|---|
| Type | Sets the lighting method. Directional lights cast light from a single direction at infinity, Spot lights also cast light from a single direction, except they have a cone-shaped falloff, and Omni lights cast light in all directions. |
| Color | Sets the color and intensity of the light. |
| Brightness | Sets the intensity of the light. Brightness also determines the effective distance over which light is cast. Brighter lights cast farther. This value is proportional to meters, on a logarithmic scale: increasing this value by one increases light output tenfold. |
| Temperature | Enables the use of temperature to adjust light color. |
| Kelvin | Produces a color tint based on the black body radiation temperature, in degrees Kelvin. This result is multiplied with the light color. |
| Temperature Presets | Select from a list of preset color temperatures, calibrated to common light sources. |
| Lens Flare | Determines whether or not this light casts lens flare. Learn more about Lens Flares in the Camera section. |
| Flare Strength | Sets the lens flare strength of the light. |
| Cast Shadows | Determines whether or not objects in the scene occlude light. |
Area / Shape
These settings define the physical shape of light.
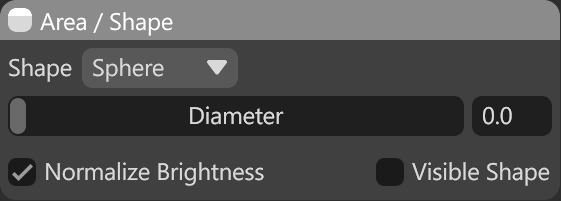
| Setting | Description |
|---|---|
| Shape | Determines the geometry of the light source (Sphere or Rectangle). |
| Diameter (Sphere) | Sets how large the light source is, which defines how blurry the shadows are. |
| Two Sided (Rectangle) | Cast light from both sides of the rectangle. |
| Width/Height (Rectangle) | Sets how much the light is stretched along the X axis, useful for creating non-spherical lights such as fluorescent tube lightning. |
| Normalize Brightness | Makes the light shape size only affect shadow softness and not the amount of emitted light. |
| Visible Shape | Sets whether or not the light shape shows up in the rendered image. |
Spot
These settings are relevant to the Spot light object.

| Spot Angle | Sets the width of the spotlight cone. This setting only applies when light type is set to “Spot”. |
| Spot Sharpness | Sets the softness of the spotlight cone. This setting only applies when light type is set to “Spot”. |
Gel
These settings let you project the light using a Gel mask, which is useful when creating caustics or similar effects.
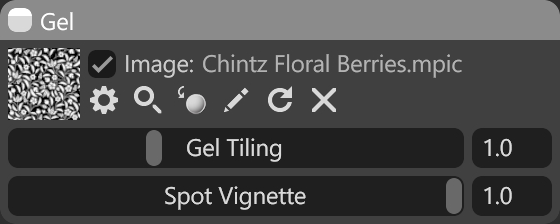
| Setting | Description |
|---|---|
| Light Gel Texture | Loads an image to mask the light shape. |
| Gel Tiling | Sets how many times the gel image repeats. |
| Spot Vignette | Determines whether the spotlight shape is square or circular in nature. Higher values equate to rounder shapes. A value of 0 is useful for loading a gel image to create a custom cone shape. This setting only applies when the light type is set to Spot. |
