This section contains tips and tricks to turn you into a baking wizard, Harry. Learn how your high and low poly construction, UVs, and key settings affect your bakes.
Slopes and Bevels #
When the baker projects information from the high poly to the low poly for a normal map, it only sees changes in direction, not depth. Thus, faces that are completely parallel will not record information. You can use slopes, bevels, or both to ensure your geometric detail gets baked.
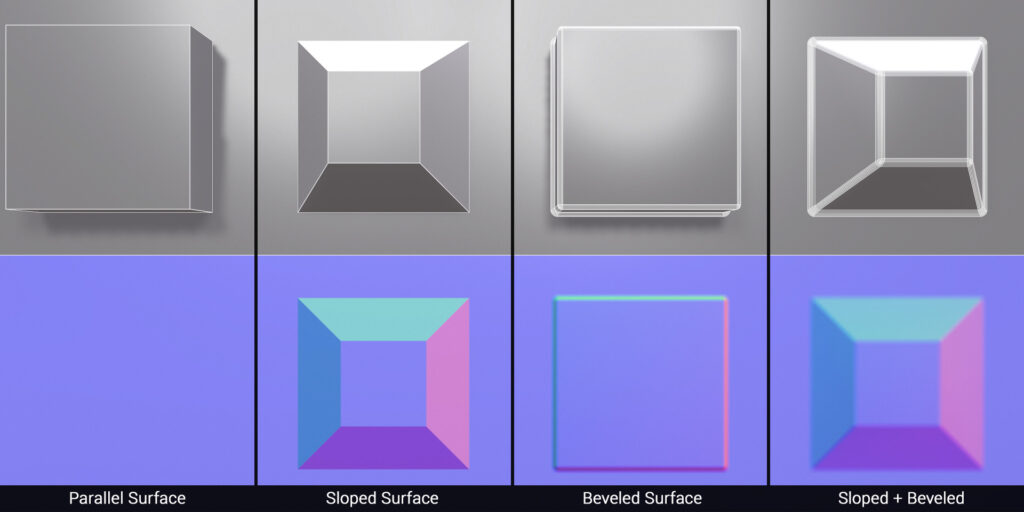
Similarly, the distance an element sticks out from the base surface won’t alter the resulting normal map. Shortening the depth of details like bolts can enable you to create a cage with a more manageable offset distance.

Floaters #
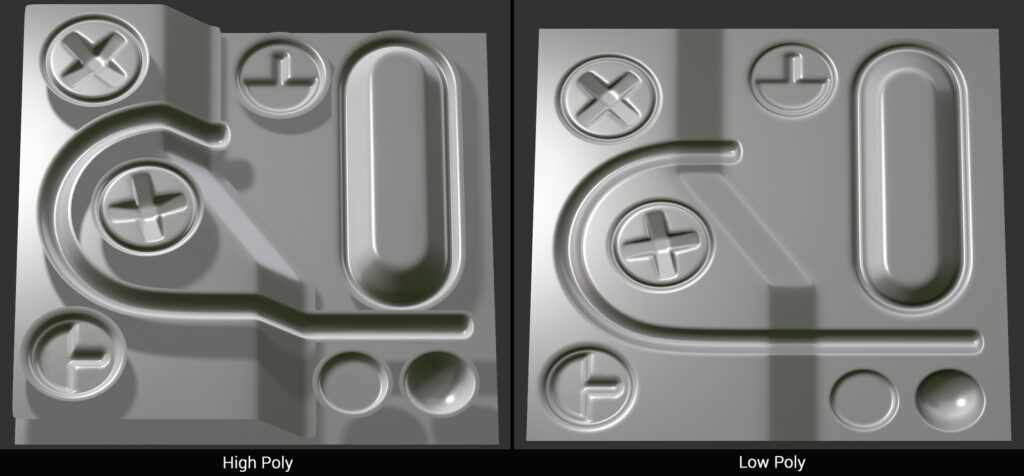
You can float details on top of the surface to create the illusion of complex indented detail. This saves time and can make your high poly mesh easier to work with. The primary drawback to using floaters is that outputs that depend on distance, such as height or position, may not produce desirable results.
Detail Size #
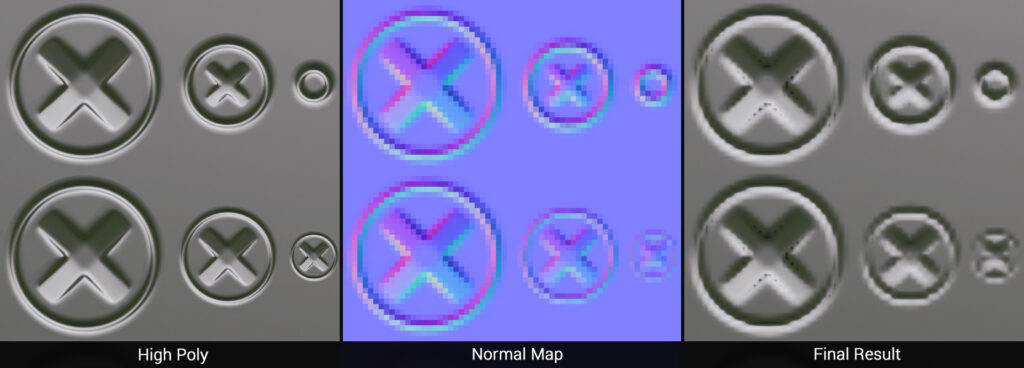
When it comes to fine detail, it’s important to keep in mind the size of your object, viewing distance, and resolution of your texture. Details smaller than 1 pixel will not be recorded properly, so it’s best to maintain a consistent minimum size for bevels and other fine structures. Additionally, If your model is seen from a distance, it can be a good idea to exaggerate bevels to ensure readability.
In addition to ensuring your detail is captured, beveled edges catch specular highlights and generally look nice. Most real-world objects have rounded edges, though you may want to exaggerate your bevels depending on the size of your object and the expected viewing distance to retain readability.
Hard Edges and UVs #
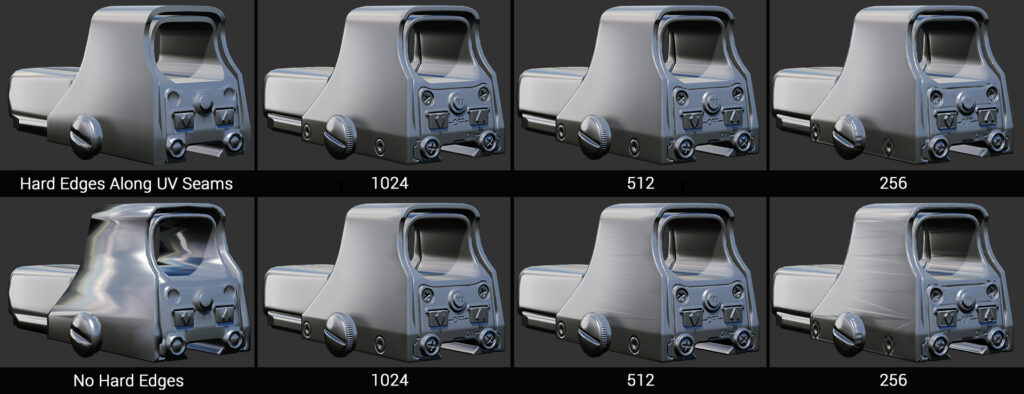
When using hard edges (or smoothing groups), it’s important to ensure that you break apart your UV islands along all hard-edge borders. If you use hard edges but do not split your uvs, you will get seam artifacts as each face will try to bake onto the hard edge line.
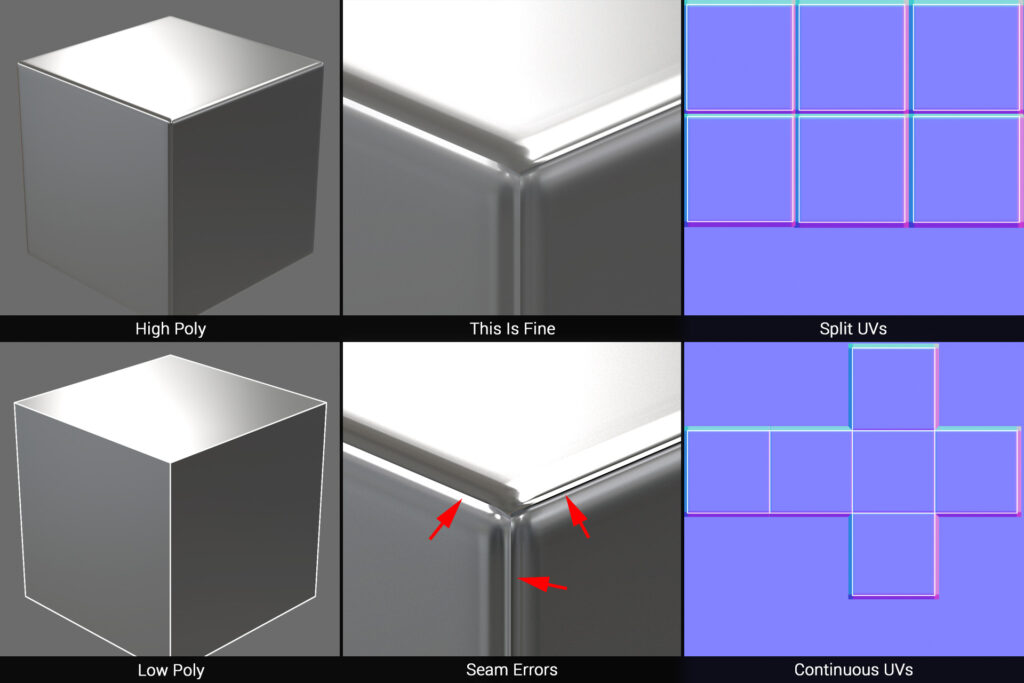
While using hard edges along all uv borders is unnecessary, it can be beneficial to do, especially with hard surface assets. Using hard edges at UV seams can create less extreme smoothing on the low poly, which means the resulting bake will hold up better at lower resolutions or mip map levels and when applied to LOD meshes. Pay close attention to the thin lines on the above image: while a synced workflow can compensate for extreme shading, lack of resolution can result in errors along the triangle borders of the low poly.
Low Poly Size #
Make sure that your low poly is as close in size to your high poly as possible. If your low poly is too big or too small, projection errors can occur. Don’t worry about fully encompassing the high poly with the low poly; that is what the cage is for.

The Right Number Of Sides #
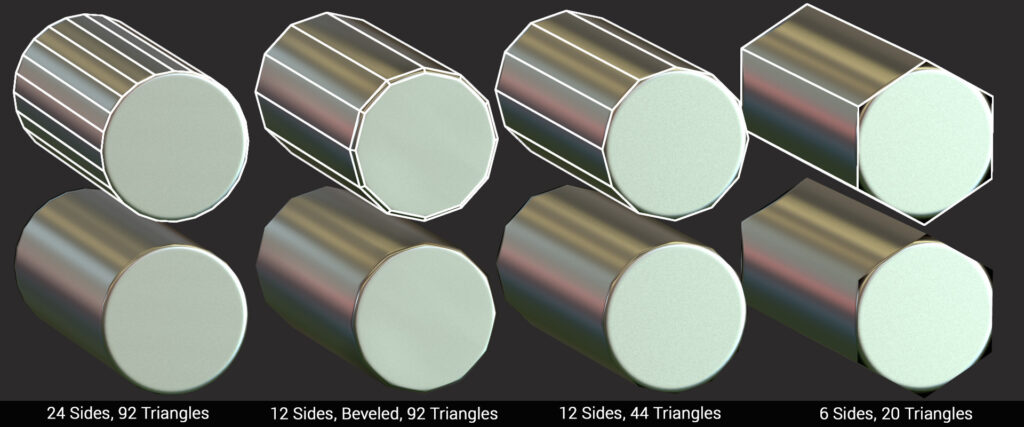
Matching the curvature of the high poly is important. While normal maps can easily represent fine detail, they can’t alter the silhouette. Using an appropriate number of sides for curved surfaces reduces waviness and makes your asset look better. Bevels can help combat waviness to a certain degree, but increasing the number of sides tends to be more effective.
Cap The Gaps #
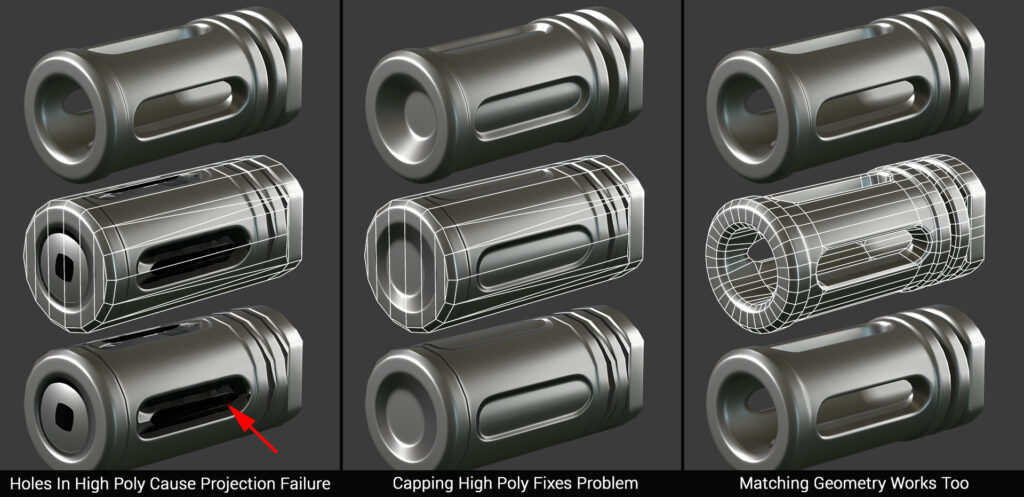
Holes in the high poly can result in errors, as the Baker cannot hit a sensible surface. There are two solutions here. One is to cap the holes in your high poly, which is generally the way to go if you’ve got a low polygon budget. The other solution is to match the shape of the high poly more accurately, in this case modeling the holes into the low poly as well.
Triangulation and X-Shaped Errors #
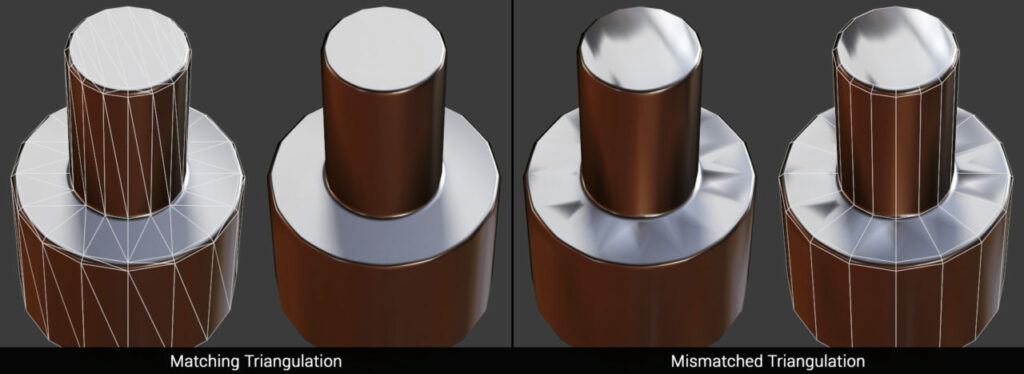
Make sure to triangulate your mesh before importing it into Toolbag. If your mesh is not triangulated, the internal edges of quads and n-gons may vary between applications, resulting in a triangulation mismatch which causes x-shaped smoothing errors. This is essentially a type of tangent space mismatch, as variance in the edge direction can cause the tangent basis to differ.
Note: If you are using Maya, you may want to lock the mesh normals first, as the mesh normals change upon triangulation.
Banding, Bit Depth, and Dithering #
A lack of precision with 8-bit normal maps causes banding artifacts. There aren’t enough color values to accurately represent subtle differences between the high and low poly surfaces, resulting in stair-stepping artifacts.
Dithering will eliminate banding artifacts at the expense of a bit of noise added to the normal map. Noise is generally preferable, as most surfaces have some degree of texture, so it is on by default in Toolbag. You can also bake a 16-bit normal map, which results in a smoother bake; however, many renderers require an 8-bit normal map. If you bake a 16-bit map, you’ll likely need to convert to 8-bit color for the final texture, which can result in dithering and noise. However, some artists prefer to work with 16-bit source content in order to defer dithering to the final stage.


