
This page outlines and defines various output map types and their settings in Toolbag’s Bake Projects. Output maps must be configured to match the material requirements of your target renderer/game engine.
These output maps can be quickly linked as Input Maps to Toolbag’s Texture Projects. Learn more about this process on the Input Maps page.
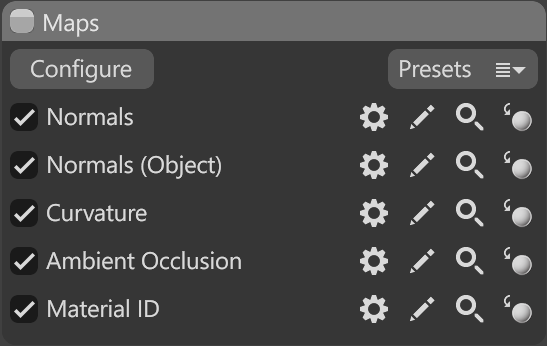
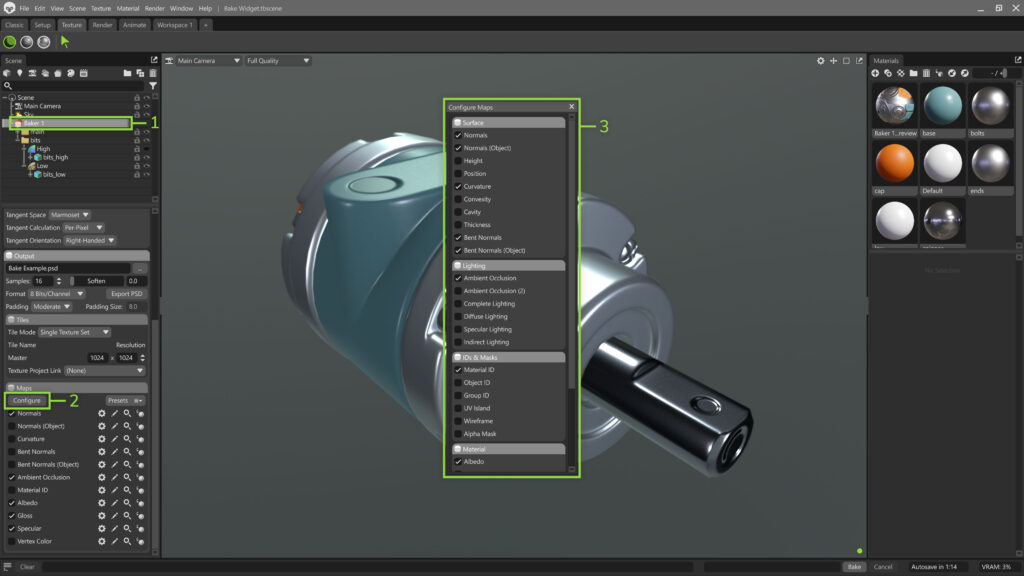
Configuring Maps #
You can choose which maps to bake by pressing the Configure button and adding any maps you need from the available list. Added maps can be enabled or disabled at any time. You can also apply one of the built-in map presets or save your own custom preset for future use.
Common Map Settings #
The table below lists common settings shared by many maps. Unique map settings will be covered in the descriptions of each map type beyond this section. Click the gear icon (⚙️) next to each map name to adjust the applicable settings per map.
| Setting | Description |
|---|---|
| Suffix | Sets the suffix that will be appended to the end of the file name. |
| Dither | Adds a small amount of noise to combat banding articles. When Dither is enabled, lower rays can generally be used while producing a superior bake. |
| Reset | Resets the suffix name to default. |
| Strength | Sets the strength of the map output. Smoother meshes may require a higher strength value to make features clearly visible. |
| Ray Count | Determines the quality of the baked information. More rays will result in a smoother result but slower bakes. The default setting of 256 provides medium quality, values from 512+ will result in high quality, and values under 256 can be useful for quick test bakes. |
| Search Distance | Determines the maximum distance a sample ray can travel with a setting of 0 resulting in unlimited distance. |
| Ignore Groups | Bakes information between different bake groups. This helps to ground the various parts of complex objects. If you have certain elements that are removable or animate, a scope or magazine on a gun, you can move these bake groups off to the side so they don’t influence one another. |
| Bounces | Limits the number of ray-traced diffuse and specular light reflections. Higher values improve image quality but take longer to render. |
| Use Materials | When enabled, this uses material properties for the first bounce of light. Secondary bounces will always use material properties. Disabling this option can be useful for baking light maps. |
| Samples | Sets the number of render samples per pixel. Higher values improve image quality but take longer to render. |
| Denoise Strength | Adjusts the strength of the denoising effect. A value of zero skips denoising altogether. |
Surface Maps #
| Map Type | Description |
|---|---|
| Normals | Bakes a tangent space normal map, with options to flip the red (X), green (Y), and blue (Z) channels. |
| Normals (Object) | Bakes an object space normal map. Object space normal maps are not commonly used in game or film assets but are an excellent source for generating directional masks for your textures, for instance, adding a layer of dust to the top of your object. |
| Height | Bakes a height or displacement map. The Inner/Outer Distance sliders determine the minimum and maximum distances (in scene units) that will be recorded. If you have detail that extends 2 units in, and 5 units out, you would set these values to -2 and 5, respectively. To ensure that your zero point is 50%, set the min and max values proportionally, for instance, -5 and 5 |
| Position | Otherwise known as a gradient map, this bakes the position of your mesh in the X, Y, and Z channels to the RGB channels of the image. A position map is a good source for generating texture masks and, for instance, creating a gradient in color or saturation from the bottom to the top of your asset. Normalization modes include Bounding Box and Bounding Sphere. |
| Curvature | Bakes both convexity and cavity maps. By default, curvature maps are baked in greyscale, where concave details are brighter while convex shapes are darker. They are useful for generating masks for scratches, recessed dirt, and other effects. |
| Convexity | Bakes convex surfaces or sharp edges, which is useful for generating texture effects such as scratched edges. |
| Cavity | Bakes a map of the concave surfaces or cracks and pits, which is helpful for masking ambient light or generating texture effects such as dirt, dust, and grime. |
| Thickness | Also known as transmission, this bakes a map based on the thickness of the high poly mesh. Thinner areas create bright values while thicker areas are dark. The Scale slider adjusts the scale of the thickness value range as a proportion of the model bounds. Gamma applies a gamma curve to the final color values if you prefer to have a higher contrast appearance. |
| Bent Normals | Generates a normal map with ambient occlusion baked into the normal vector data. Bent Normals maps can be used to simulate complex lighting with specific shaders. |
| Bent Normals (Object) | Bakes a bent normals map in object space rather than tangent space. |
Lighting Maps #
| Map Type | Description |
|---|---|
| Ambient Occlusion | Bakes light occlusion information from a high poly source. AO can be used in shaders to provide ambient shadows or as a source to generate masks for texturing. The Floor Occlusion adds occlusion under the model, and the Floor slider adjusts the strength of the effect. The Two-Sided option will cast information from the backfaces of high poly objects, which is desirable for accurately capturing AO around object intersections but will cause shadows around floating geometry. Consider baking two maps with this setting on and off for complex assets and composite them in your image editor. Cavity Weight adjusts the relative influence of occlusion samples at different angles. A value of -1 corresponds to normal diffuse AO, 0 gives evenly weighted sampling, and higher values add more occlusion in cavities. |
| Ambient Occlusion (2) | Bake a second ambient occlusion map with separate settings. |
| Complete Lighting | Bakes your scene’s material colors, diffuse lighting, shadows, and specular reflections. The material properties are defined by the material(s) applied to the high poly mesh(es). The Exposure slider adjusts the brightness of the baked lighting. |
| Diffuse Lighting | Bakes the lighting and shadows from the Sky Light and direct lights in the scene. The material properties are defined by the material(s) applied to the high poly mesh(es). |
| Specular Lighting | Bakes the specular reflections and shadows from the Sky Light and direct lights in the scene. Material properties are defined by the material(s) applied to the high poly mesh(es). Specular lighting is a camera-dependent effect and will not render the backside of your model. |
| Indirect Lighting | Bakes a map of diffuse and specular indirect lighting bounces. Use the Light dropdown to choose baking indirect Full, Diffuse, or Specular indirect lighting information. |
IDs & Masks #
| Map Type | Description |
|---|---|
| Material ID | Bakes a unique color for each material assigned to your high poly objects. The colors are automatically applied, so if you would like to set specific material ID colors, you can apply the colors to the albedo of your high poly object’s materials and bake an Albedo map. |
| Group ID | Bakes a unique color for each material group. |
| Object ID | Bakes a unique color for each material object. |
| UV ID | Bakes a unique color for each UV island. |
| Wireframe | Bakes a map representing the low poly mesh’s UV layout. |
| Alpha | Bakes a map of the holes or gaps in a high poly mesh. |
Material Channel Maps #
| Map Type | Description |
|---|---|
| Albedo | Bakes the albedo value (this works with a simple color value, an image input, or both) from the high poly material(s). |
| Gloss | Bakes the gloss value (this works with a simple color value, an image input, or both) from the high poly material(s). |
| Specular | Bakes the specular value (this works with a simple color value, an image input, or both) from the high poly material(s). |
| Albedo (Metal) | Bakes a color map suitable for the metalness workflow from the high poly material(s). |
| Roughness | Bakes the roughness value from the high poly material(s). |
| Metalness | Bakes the metalness value from the high poly material(s). If your materials do not have metalness inputs, metalness content will be generated automatically. There is a Metalness Threshold setting to fine-tune this conversion, which does not apply if the source materials use the metalness workflow. |
| Emissive | Bakes a map based on the emissive values set in the high poly material(s). |
| Transparency | Bakes a map based on the transparency values set in the high poly material(s). |
| Vertex Color | Bakes vertex color or zBrush polypaint data to an image. Gamma Curve applies a gamma curve to the vertex color values. Use this setting if the vertex colors on your mesh are not linear values. Enabling Use Alpha includes vertex alpha values in the final result. |