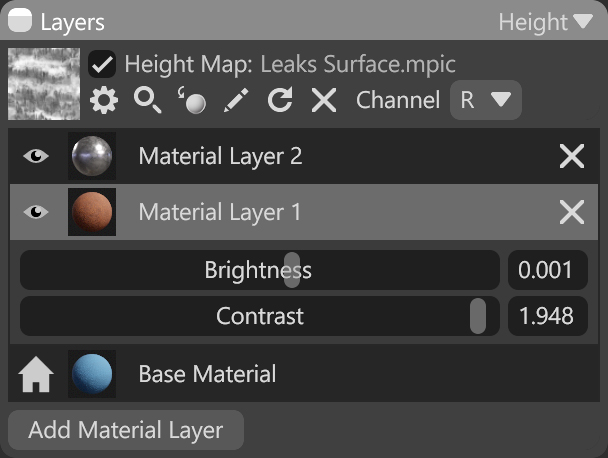
Height mode in a material’s Layers module allows you to blend multiple material layers using a grayscale height texture as a mask. Each material can have only one height texture assigned. You can use a texture from Toolbag’s Library, paint a height map using a Texture Project within Toolbag, or create one using third-party applications.
The base layer defines the primary shading models, however, you can disable shading models for individual layers to restrict certain effects. You can add as many material layers as needed, but keep in mind that increasing the number of layers may impact performance.
| Setting | Description |
|---|---|
| Height Map Texture Slot | Add a height mask texture by clicking on the slot or dragging and dropping one from the Library. |
| Channel Selection | Select the channel of the texture that will be used for blending. It’s useful when, instead of using multiple single textures, you use one texture with different grayscale maps in the different texture channels: Red, Green, Blue, and Alpha. |
| Layer Visibility | Hide or show the current material layer. |
| Delete Layer | Delete the material layer. |
| Brightness | Adjust the brightness of the mask to make the mask more or less intense. |
| Contrast | Adjust the contrast of the mask to make the mask sharper or smoother. |
| Add Material Layer | Add an extra material layer. Note: Adding too many layers can cause performance issues. |