
Input Maps are your base texture inputs for the material linked with your Texture Project. These maps should be unique to the mesh you intend to texture and are typically generated by the texture baking process (from a Bake Project in Toolbag or an external source). Check out the Map Types article in our Baking section to see visual examples of each input map and how to generate them.
The pixel data in each Input Map will be used in the Texture Project’s layering system as base color values for each of your active Project Maps and will also drive Input Processor layers for more intelligent masking based on information in your Input Maps.
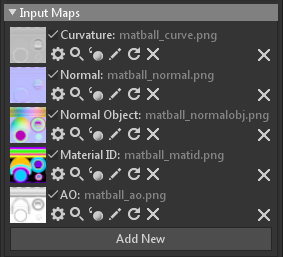
The basic UI for managing Input Maps is as follows:
| Setting | Description |
|---|---|
| Input Map Texture | Click to load or replace a texture map. |
| Remove | Remove an input map from the texture project. Any layer types that use this input may no longer render correctly if removed. |
| Add New | Add an input map that is not presently listed i.e Transmission Mask, Sheen, Glint, Thickness etc. |
Input Map Types #
The following is a complete list of all Input Map types supported, and what each map controls in your Texture Project.
Surface Maps
| Setting | Description |
|---|---|
| Curvature | Helps define the convexities and concavities of the mesh, useful for masking or defining borders and cavities. This map is used in the Curvature, Dirt, and Scratch Processor Layers. It also uses Sync Point data when available. If the input map is missing, it will be automatically generated from tangent normals or mesh normals. |
| Normal | Fakes the lighting of details like bumps and dents to give textures depth without using more mesh geometry. It uses RGB colors to define the lighting direction of these details in tangent space. This map is used in the Direction Processor Layer. |
| Normal Object | Provides normal data in object space, defining normal vectors relative to the object’s local coordinate system. This differs from tangent-space normals, which are defined relative to the surface. Useful for specific effects or workflows requiring object-relative normal data. This map is used in the Direction Processor Layer. |
ID Maps
| Group ID | Identify and isolate different groups of polygons on a 3D model. This map is used in the Color Selection Processor Layer. |
| Material ID | Identify and isolate distinct material groups within a 3D model. This map is used in the Color Selection Processor Layer. |
| Object ID | Identify and isolate different groups of objects of a 3D model. This map is used in the Color Selection Processor Layer. |
| UV Island | Identify and isolate different groups of UV islands of a 3D model. This map is used in the Color Selection Processor Layer. |
Lighting Maps
| Setting | Description |
|---|---|
| AO | A shadowing technique that includes soft shadows simulated by intersecting geometry to help make your asset more realistic. This map is used in the Dirt, Occlusion, and Scratch Processor Layers. It also uses Sync Point data when available. If the input map is missing, it can be automatically generated from tangent normals or mesh normals. |
| Anisotropic Dir. (v.5+ only) | Helps define the direction of anisotropic reflections, which vary with viewing angle. This is particularly useful for materials with brushed or grooved surfaces, like brushed metal or hair. |
| Cavity | Stores small-scale ambient occlusion and defines cavity detail. |
| Custom | Defines specific material properties beyond those generated by default or baked from a high-poly model. |
| Fuzz | Defines fabric and other microfiber materials to make them look more realistic. |
| Glint | Allows you to author a glint mask, which is used to isolate areas where glint should appear. |
| Glint Roughness | Author a glint roughness map to define the roughness of the glint map. |
| Refraction Depth | Configures the depth of your refraction map. Refraction is the process by which light bends as it passes through transparent materials or liquids, distorting how objects appear. |
| Sheen | An RGB texture that controls the color and intensity of the sheen effect. |
| Sheen Roughness | This grayscale texture controls the roughness of the sheen effect. |
| Thickness | Sets the thickness input map as the base content for the scatter project map. This map is used in the Thickness Processor Layer. |
| Transmission Mask | An omnidirectional thickness map for semi-translucent materials. |
Material Maps
| Setting | Description |
|---|---|
| Albedo | Establishes the base color of your material. It’s typically a single color or a flat light image. |
| Bump | A greyscale map that simulates depth information, such as bumps or wrinkles on an object. |
| Emissive | Adds emission and a glow effect to your material. |
| Gloss | Gloss and Roughness maps control the material’s glossiness (shininess). The difference between them is how the value ranges are mapped. For Gloss maps, 0 (black) represents a rough, porous surface, and 1.0 (white) represents a glossy, smooth, mirror-like surface. For Roughness maps, the value range is inverted, with black representing glossy surfaces and white representing rough surfaces. |
| Height | Similar to normal maps, they are used to add small to mid-level details to your texture. The difference is that height maps will tessellate your mesh instead of faking detail like normal maps (increasing the poly count) and add the data to the 3D mesh. This map is used in the Height Processor Layer. It also uses Sync Point data, when available. If the input map is missing, it will be automatically generated from tangent normals or mesh normals. |
| Metalness | Defines whether areas of your material behave like metal or not. Black values in the map will appear as metal, and white areas appear as an insulator. |
| Roughness | Roughness (also called glossiness or microsurface scattering) defines how light scatters across the surface of your model. |
| Specular | You can use a specular map instead of a Metalness map in PBR texturing. Specular maps in PBR can use full RGB color and affect how you design your albedo. |
| Transparency | Used when working with transparent materials to make some parts less opaque than others. |