
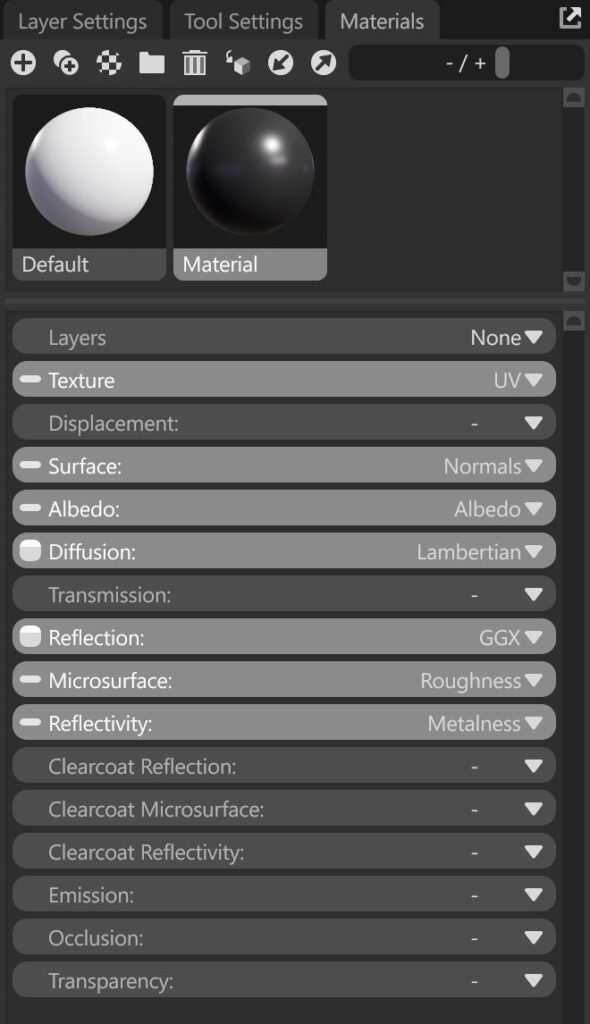
The Materials window in Toolbag offers an intuitive interface for creating and configuring a diverse range of material types. It includes comprehensive shading models to help you create realistic skin, fabric, and refractive materials, among other effects.
One of the main benefits of the material system is that users don’t need to create shaders using complex node setups or manual coding. Toolbag already features a built-in, modular, and multifunctional shader setup, enabling you to create a wide range of complex materials and effects.
You can auto-load textures with correct naming conventions by dragging a texture from a folder into the corresponding texture slot. The rest will be automatically assigned to the appropriate slots.
Each material shading model has a dedicated page in the left-hand side menu, containing descriptions of the available shading models. The shading modules available in Toolbag include:
| Setting | Description |
|---|---|
| Layers | Lets you stack multiple texture layers in a single material, adjust them independently, and blend them to achieve various complex effects. You can blend between layers using three shading models: Mask, Vertex Color, or Height. |
| Texture | Provides basic transformation and wrap settings for your material. This module contains three shading models: UV, UDIM, and Triplanar. |
| Displacement | Modifies the geometry of a model to create surface details such as bolts, wrinkles, and others. This module contains three shading models: Height, Vector, and Parallax. Note: To achieve the best quality of these modifications, a high-bit texture map and a mesh density sufficient to displace the details are necessary. |
| Surface | Controls a material’s interaction with light and its visual depth. It includes Normals, Detail Normals, and Bevel. |
| Albedo | Defines your material’s colors using Albedo, Vertex Color, and Albedo Gradient shading models. |
| Diffusion | Controls how light scatters across the surface of a material after striking it. This module includes Unlit, Lambertian, and Microfiber shading models, each simulating different types of surface light behavior. |
| Transmission | Simulates how light travels through a material, interacting with its internal structure. It includes Refraction, Subsurface Scattering, Volumetric Scattering, and Thin Surface, which are essential for rendering materials such as glass, skin, or liquid. Transmission models control how light bends, scatters, or is absorbed beneath the surface. |
| Reflection | Simulates light bouncing off surfaces for realistic metallic/glossy materials. Unlike Diffusion, which scatters light within rough/matte materials, Reflection handles specular, mirror-like light bounces, creating highlights and environmental reflections. This module includes GGX, Glint, Anisotropic, and Hair shading models. |
| Microsurface | Controls the smoothness or roughness of a surface, affecting its specular reflection. By adjusting the microsurface properties, you can control the intensity of reflections on your materials. This includes Gloss, Roughness, and Advanced Micro shading models. |
| Reflectivity | Controls the amount of light reflected off a material’s surface, affecting its perceived brightness. This module contains Specular, Metalness, Advanced Metalness, and Reflective Index shading models. |
| Clearcoat Reflection | Clearcoat materials simulate an additional layer of highly reflective coating on top of a material, creating a glossy and reflective surface. This module includes GGX, Anisotropic, Newton’s Rings, and Hair. Generally, you’ll want to set this to GGX. However, if you’re creating hair or brushed metal, Anisotropic would be a better choice. |
| Clearcoat Microsurface | Controls the smoothness or roughness of the clearcoat layer, affecting its specular reflection and the appearance of highlights on the coated layer. This module includes Gloss, Roughness, and Advanced Micro shading models. |
| Clearcoat Reflectivity | Controls how much light is reflected by the clearcoat layer, affecting its overall brightness and the intensity of reflections. This module includes Specular and Reflective Index shading models. |
| Emission | Allows you to make the surface appear self-illuminated or glowing. It can be used to create light sources or simulate objects emitting light, adding vibrancy and illumination to your scenes. Shading models include: Emissive, Heat, and Fluorescent. |
| Occlusion | Creates the illusion of darkening crevices and corners by blocking ambient light. It is generally used to help ground objects in the scene and adds another layer of realism and depth. Shading models include Occlusion. |
| Transparency | Controls the visibility of a surface by adjusting the amount of light that passes through it, without simulating internal interactions. It’s used to create materials that appear clear or semi-transparent, like tinted glass, plastic film, or netting. Unlike Transmission, it does not account for refraction or internal scattering. Shading models include Cutout and Dither, which provide different methods of controlling opacity. |
Materials can also be linked to the Texture Project and Baking Project systems. Their settings may vary depending on the system they are connected to. If a material is linked to the Texture Project, it will utilize all of the Project Maps you have set up. If the material is linked to a Baking Project, it will only use the maps you have baked for that project.
Materials Toolbar #
| Setting | Description |
|---|---|
| New | Create a new material. |
| Duplicate | Duplicate the selected material. |
| Presets | Create a material from a preset. |
| Group | Create a new material group. |
| Delete | Delete the selected material or group. |
| Apply | Apply the selected material to the selected scene object(s). |
| Import | Import a material file from disk. |
| Export | Export a material file to disk. |
| Size | Change the thumbnail size. |