
Sync Points are a layer type introduced in Toolbag 5 that automatically generate surface data such as curvature, ambient occlusion, and height based on the layers below them. The generated data can be updated at any time, allowing you to refresh masks and material effects whenever you want to reflect recent changes.
Sync Points are commonly used to drive effects like edge wear, dirt buildup, and surface depth without baking from a high-poly mesh. They make it easier to iterate on details non-destructively and help keep procedural effects consistent as the texture project evolves.
Sync Point Toolbar #
The Sync Point Toolbar provides controls for managing Sync Points, including creating and updating Sync Point layers and accessing their settings. The toolbar is located at the bottom of the Layers window.

| Setting | Description |
|---|---|
| Add Sync Point | Add a new sync point layer. Sync points synchronize input curvature, height, and ambient occlusion maps with layers below. |
| Refresh Sync Point | Regenerate any out-of-date sync point maps. Note: Sync Points can also be refreshed by clicking their layer icon. |
| Sync Points Settings | Open the sync point settings window. |
Sync Points Settings #
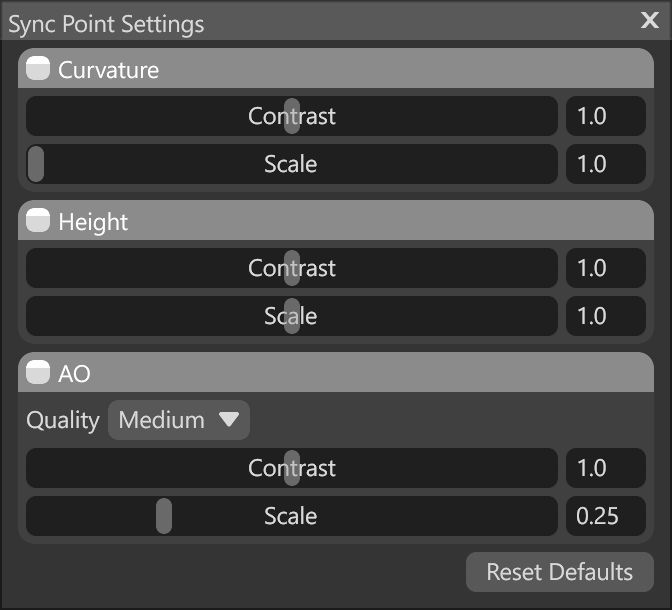
The Sync Point Settings window controls the contribution and strength of Curvature, Height, and Ambient Occlusion data generated by the Sync Point.
| Setting | Description |
|---|---|
| Curvature Contrast | Adjusts the visual contrast of the generated curvature map. |
| Curvature Scale | Adjusts the size of the curvature filter. Larger scales produce broader, softer gradients. |
| Height Contrast | Adjusts the visual contrast of the generated height map. |
| Height Scale | Adjusts the search size for neighboring detail, potentially yielding more accurate height generation at larger scales. Larger-scale values will take more time to compute. |
| AO Quality | Higher quality ambient occlusion will exhibit less banding and noise, but takes more time to compute. |
| AO Contrast | Adjusts the visual contrast of the generated ambient occlusion map. |
| AO Scale | Adjusts the effective height of normal map detail used to compute occlusion. Higher scales provide more pronounced occlusion. |
| Reset Defaults | Resets sync point settings to their default values. |
Sync Points Layer #
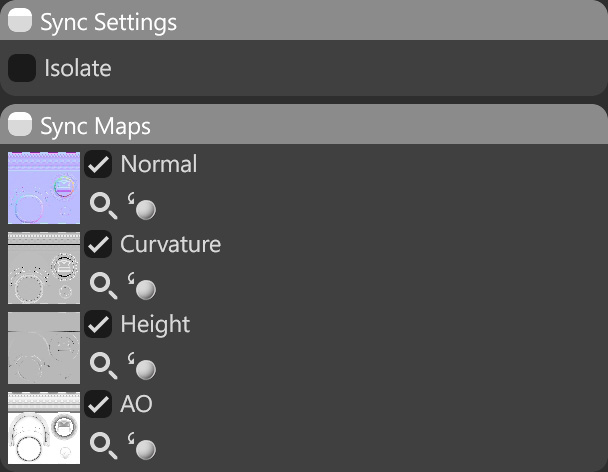
The Sync Point layer controls how surface data is evaluated from the layers below and which texture maps are synchronized for use.
Starting with Toolbag 5.02, Sync Points are no longer restricted to the root level of the layer stack. They can be placed inside groups and parented to other layers, allowing Sync Points to be saved as part of Smart Materials. This enables preset effects that adapt to the geometric features built up within the layer stack. Sync Points can be placed into groups or layers by moving them within the layer stack.
The Isolate option limits the Sync Point’s interaction to layers within the same group. When enabled, only layers inside the group contribute to the Sync Point’s output, preventing their data from affecting layers outside the group.
| Setting | Description |
|---|---|
| Isolate | When enabled, the Sync Point interacts only with layers within its group. This is useful when a layer drives a mask effect and should not influence layers outside the group. |
| Normal | Preview of the computed Normal sync map. |
| Curvature | Preview of the computed Curvature sync map. |
| Height | Preview of the computed Height sync map. |
| AO | Preview of the computed AO sync map. |